Showing posts with label recipes. Show all posts

Feb 6, 2012

Zuppa Tuscana Soup


As I sit here with a looming head cold, throat hurting, head throbbing, and body aches. All I can think of is eating a warm bowl of Zuppa Tuscana Italian Soup. You know, the soup that the Olive Garden offers. Well, feeling this sick, I don't really want to go out, it's a good thing that I made some last week, and put some away for a time such as this. 
For those of you who like me crave this soup, but can't afford to go out to the Olive Garden every month. Then I'm sharing this guarded recipe with you all. 

You will need:
1 lb. Colissimo's Hot Italian Sausage
1 whole onion finely diced
1 TBS. garlic powder + additional to taste
1/2 TBS. Italian seasoning.
5 washed and thinly sliced russet potatoes
12 cups chicken broth.
1 cup Hormel real bacon pieces
8 oz. fresh or frozen chopped spinach
2 cups heavy cream
Lawry's garlic salt to taste


directions:
1. cook Italian sausage (casings removed) in a large stock pot with the diced onion, garlic powder, and Italian seasoning over medium heat until sausage is cooked through. ( be sure to use the HOT Italian sausage to get that signature spice in the soup.)
2. add the thinly sliced russet potatoes with the 12 cups broth, and bacon. Bring to a boil, allow to simmer for 10 minutes.

3. add the 8oz. of spinach, simmer for an additional 10 minutes. 
4. Slowly stir in the heavy cream. add garlic salt and garlic powder to taste. 
5. heat until warmed through and serve. 
I like to serve this soup with warm Italian bread sticks.(recipe coming soon). This soup was inspired by Mrs. Robin Acree, who has taught me what it means to be hospitable. Recipe adapted from Mrs. Becky Adank and Diane Dupont. Thank you so much ladies for your godly example of ministry to others. It truly is a blessing to call you my friends. 

Pin It

I'm linking up with:
HookingupwithHoH
Beauty and Bedlam Beyond The Picket Fence
Mouthwatering Mondays

Enhanced by Zemanta

Jan 24, 2012

Valentine Cherry Pie Pops


Once upon a time, there was a bored stay at home mom. She was just browsing Etsy when suddenly inspiration struck. She saw these adorable Valentine Cherry Pie Pops. The cost: $12.00 a dozen + shipping. Whew. 

(O.K. that's enough of the third person narrative.)   
So, I decide that I'm going to make these myself. Why might you ask?
1. Because I'm el cheapo and refuse to pay that much for "treats"
2. Because I'm a DIYer 
3. Because I needed something to put on this blog for Valentines Day.
4. Because my daughter wanted me to.
Now, the last reason is absolutely the best reason, and we had a lot of fun making these. She could hardly wait to eat one. Yes, that's her holding one. 
Let me now share with you how I made them. 
You will need:
-Pillsbury rolled pie crust
- can of cherry pie filling
-Wilton Lollipop Sticks, 8", 25 count
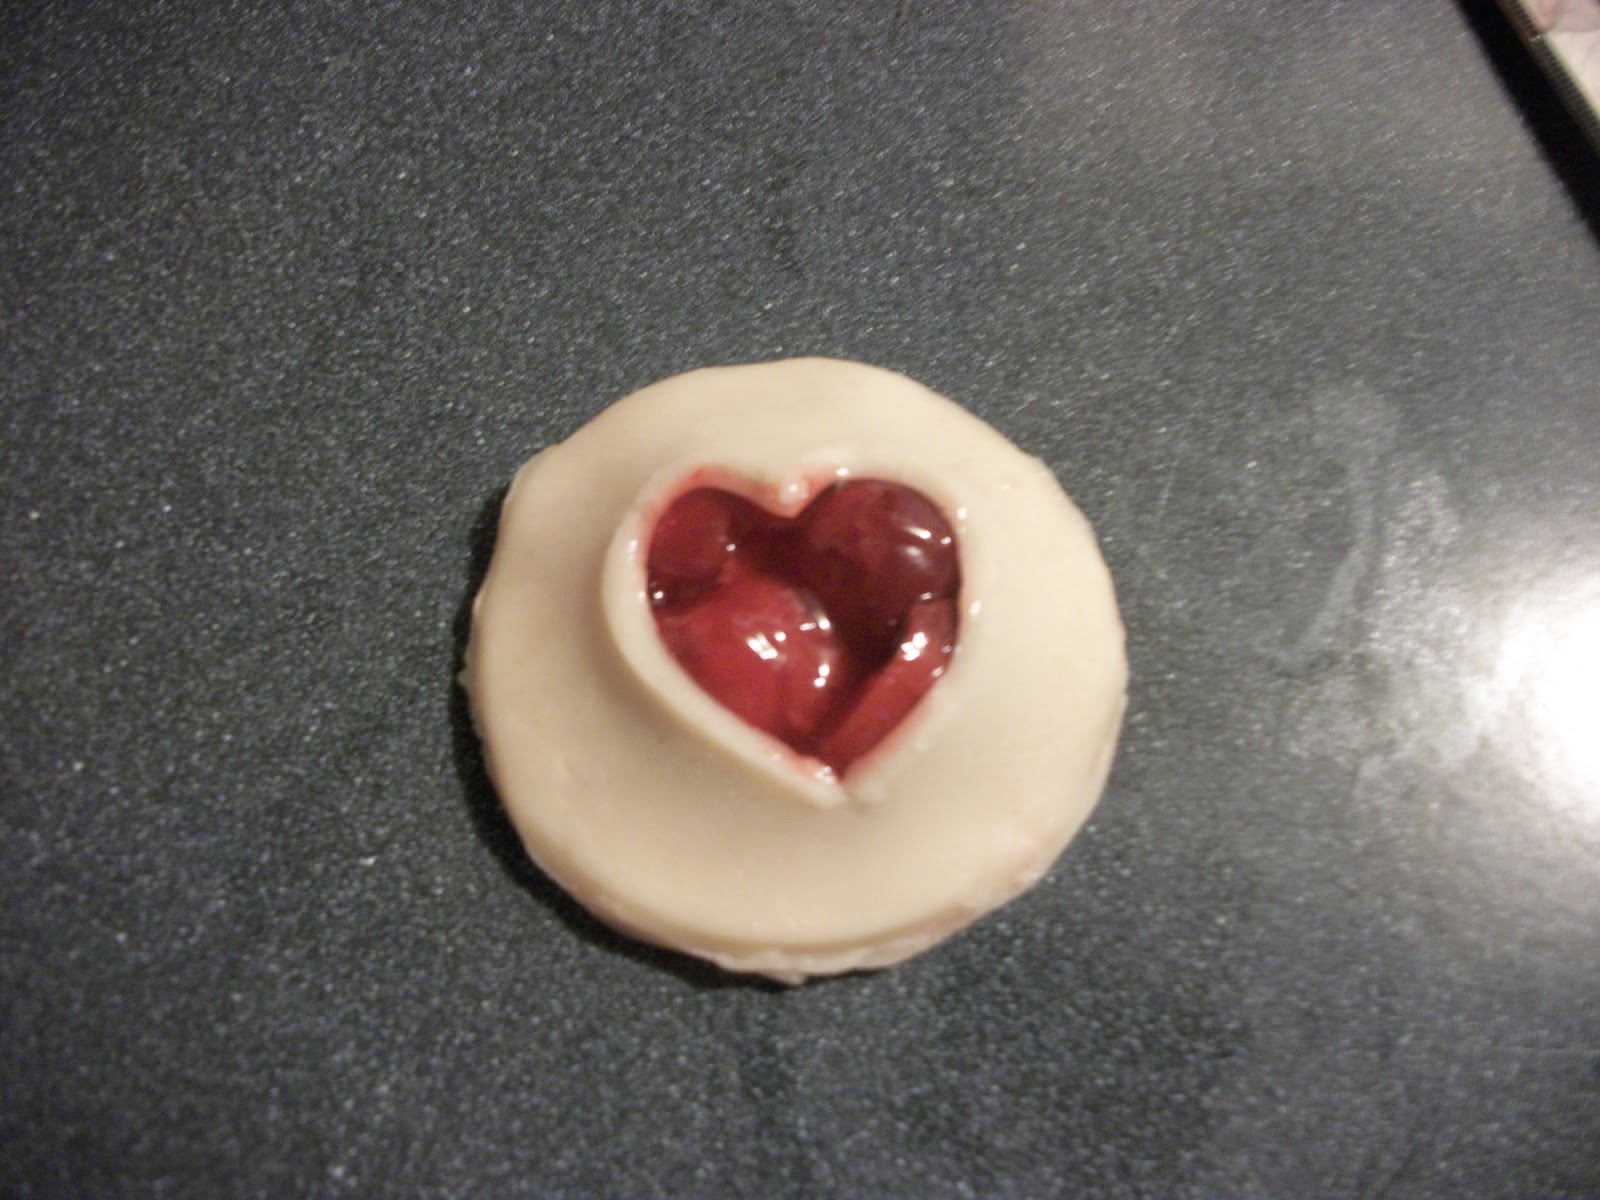
First, carefully unroll the pie crust, then you'll need to cut 2-inch diameter circles. I used a measuring cup to cut out my circles. 
next, cut out a heart shape from the circle that will be your top. ( be careful not to cut the heart out to large, or the filling will leak out. ) I just free handed it, using a knife.
Place 2 halved cherries from the pie filling onto the bottom circle. 
now, carefully place the top circle over the cherry filled circle. Now add the lollipop stick, make certain the stick is from the bottom almost to the top. ( if the stick isn't all the way to the top, then your pie pop will fall off when you try to pick it up by the stick.)
Once you've placed the stick, pinch down the edges using a fork. 
Lay pops onto a baking sheet, bake at 350 degrees for about 15 minutes, or until golden brown. It may even be fun to use the extra heart cutouts for added embellishment. 
All finished, now time to wrap them up cute to share with loved ones. 

Just wrap with plastic, tie on a little pink raffia, and attach a free printable gift tag. The gift tags were generously provided by
 Art by Julie H. (sorry, these tags are no longer available)
I hope that you enjoy the fun idea, and make the most of it. 
Thank you for stopping by,

 photo my custom signature_zpseg74gyud.png

Dec 12, 2011

Key-Lime Snowballs


I'm so excited to finally get in some holiday baking! I enjoy the tastes, smells, and lovely colors of holiday baking. I enjoy baking with my kids at this time of year. Our project for today was a first at my house but oh-so worth it. If you find Key-Lime pie delicious, then you'll love these easy to make truffles. 
What you'll need:
1 pkg. Pillsbury sugar cookie dough
juice from 2 large limes
8oz. pkg. Philly cream cheese
2 6oz. pkg. Bakers White Chocolate.
flaked coconut
Begin by opening the pkg. of cookie dough, place the dough into a large mixing bowl. Next, Squeeze the juice from both limes into the dough. Use a mixer on low speed to incorporate the juice into the dough. Your mixture should be the consistency of frosting. 
Using a spatula, spread the dough mixture onto a 9x9 cookie sheet. 
Bake at 350 degrees for about 30 min. or until edges are golden brown. 
it should look something like this. 
Once the cookie has cooled, use your hands to crumble it into a mixing bowl with the cream cheese. 
mix the lime cookie, and cream cheese together using your hands, finish mixing with a handheld mixer. You should now have a soft dough. that looks like this...
Now for the fun! 
*roll the dough into quarter sized balls
*using a toothpick, dip the ball into the melted white candy coating chocolate
*place chocolate covered ball onto wax paper
*sprinkle with flaked coconut while the chocolate is still soft.
*Chill for 1hr.
*Enjoy!
These truffles taste so yummy!  We were making them as gifts, but we'll see if there will be any left for giving.... 

Blessings,
 photo my custom signature_zpseg74gyud.png

Nov 8, 2011

Tuna Noodle Casserole

It has seemed to me that most people have a love/hate relationship with tuna casserole. Some people just love it, or they really dislike it. I would belong to the latter group. As a child, the thought of having tuna casserole would fill me with dread while my sister would be absolutely elated. As an adult, I came to realize how economical tuna casserole was. It was something that I began to make out of necessity, that same old recipe using the can of cream of mushroom soup. I could not take it any longer, there had to be something that tasted better! So I began toying around with different recipes, choosing what I liked from one, and discarding what I disliked from another. I'm sharing with you the final result, something that I've come to enjoy. I no longer dread tuna casserole. This is also my go-to dish when preparing something to give to a sick loved one. I take it to them in an aluminum pan that the person can just throw away when finished. Yes, this is the perfect hospitality dish. I hope that you'll enjoy it as much as I do, and make it for someone that you love.


What you will need:
3-4 cups uncooked country style noodles (pictured)
1 can Campbells cream of celery soup
1 1/2 cups heavy whipping cream
1-2 cans water packed tuna (depending on your taste)
3stalks finely diced celery
1/2 onion finely diced
1/2 red bell pepper finely diced
2 cups shredded cheddar cheese
1/2 cup Panko bread crumbs
Lawry's garlic salt
black pepper

Begin by boiling the noodles until almost cooked through, about 20min.
While noodles are cooking, heat about 2tbls. oil in a large skillet, add the diced vegetables along with the garlic salt. ( I don't measure the garlic salt, I just add what looks right.)
Saute the vegetables until the onions are opaque. Next, add the cream of celery soup, heavy whipping cream, and tuna to the vegetable mixture. heat through. Then season to taste with black pepper, and maybe more garlic salt. Then add this cream mixture to the cooked, and drained country noodles. Transfer the mixture to a 9x12 casserole dish, top with the grated cheese and Panko bread crumbs. Bake in a 350-degree oven for about 25min. or until the center is bubbly, and cheese is melted.

MMMMMMMM. so yummy!
" Use hospitality one to another without grudging."
1 Peter 4:9

 photo my custom signature_zpseg74gyud.png

Oct 19, 2011

Carrot Pumpkin Cupcakes with Cream Cheese Cinnamon Frosting


Fall is definitely in the air, and it's certainly beginning to influence what I cook. Warm soups, and casseroles for dinner, and of course lots of pumpkin flavored desserts. If you're in the mood for something a little sweet, with classic fall flavors, then this dessert is for you.
What you will need
1 1/2 cups of flour
2/3 cup of sugar
1 tsp. baking powder
1 tsp. baking soda
1/2 tsp. salt
1 tsp. cinnamon
pinch of nutmeg
1/2 cup of oil
2 eggs
1 cup of grated carrots
1 tsp. of vanilla
1/2 cup of Pumpkin spice Jello pudding ( prepared according to pie filling directions)
note: This Jello is only available during the fall season. I purchase this Jello at Wal-Mart. I stock up when it's available.
 1st. Prepare the Jello according to pie directions on the box.
2nd. Mix all dry ingredients
3rd. Mix all wet ingredients except for the Jello Pudding
4th. combine the wet and dry ingredients.
5th. when ingredients are well blended together add the prepared pudding. Mix well
6th. place batter into paper-lined or greased muffin pans.
7th. bake at 350 degrees for about 25min.
MEANWHILE.............................................................................................
What you'll need for the frosting:
1. 8oz. pkg. Philly cream cheese
1/4 cup butter.
3cups powdered sugar
2 tsp. vanilla
1 tsp. cinnamon

1st. Mix cream cheese and butter with mixer until well blended
2nd. continue mixing with a mixer, add the cinnamon and vanilla
3rd. continue mixing with mixer.. add the powdered sugar a little at a time until desired consistency is reached.

Note: this frosting recipe makes more than enough to frost 36 full-size cupcakes. I usually double the recipe for cupcakes.
I hope that you give this recipe a try... and enjoy with family, and friends.
Eph. 5:20
" Giving thanks always for all things unto God"
Blessings,
 photo my custom signature_zpseg74gyud.png

pumpkin spice jello